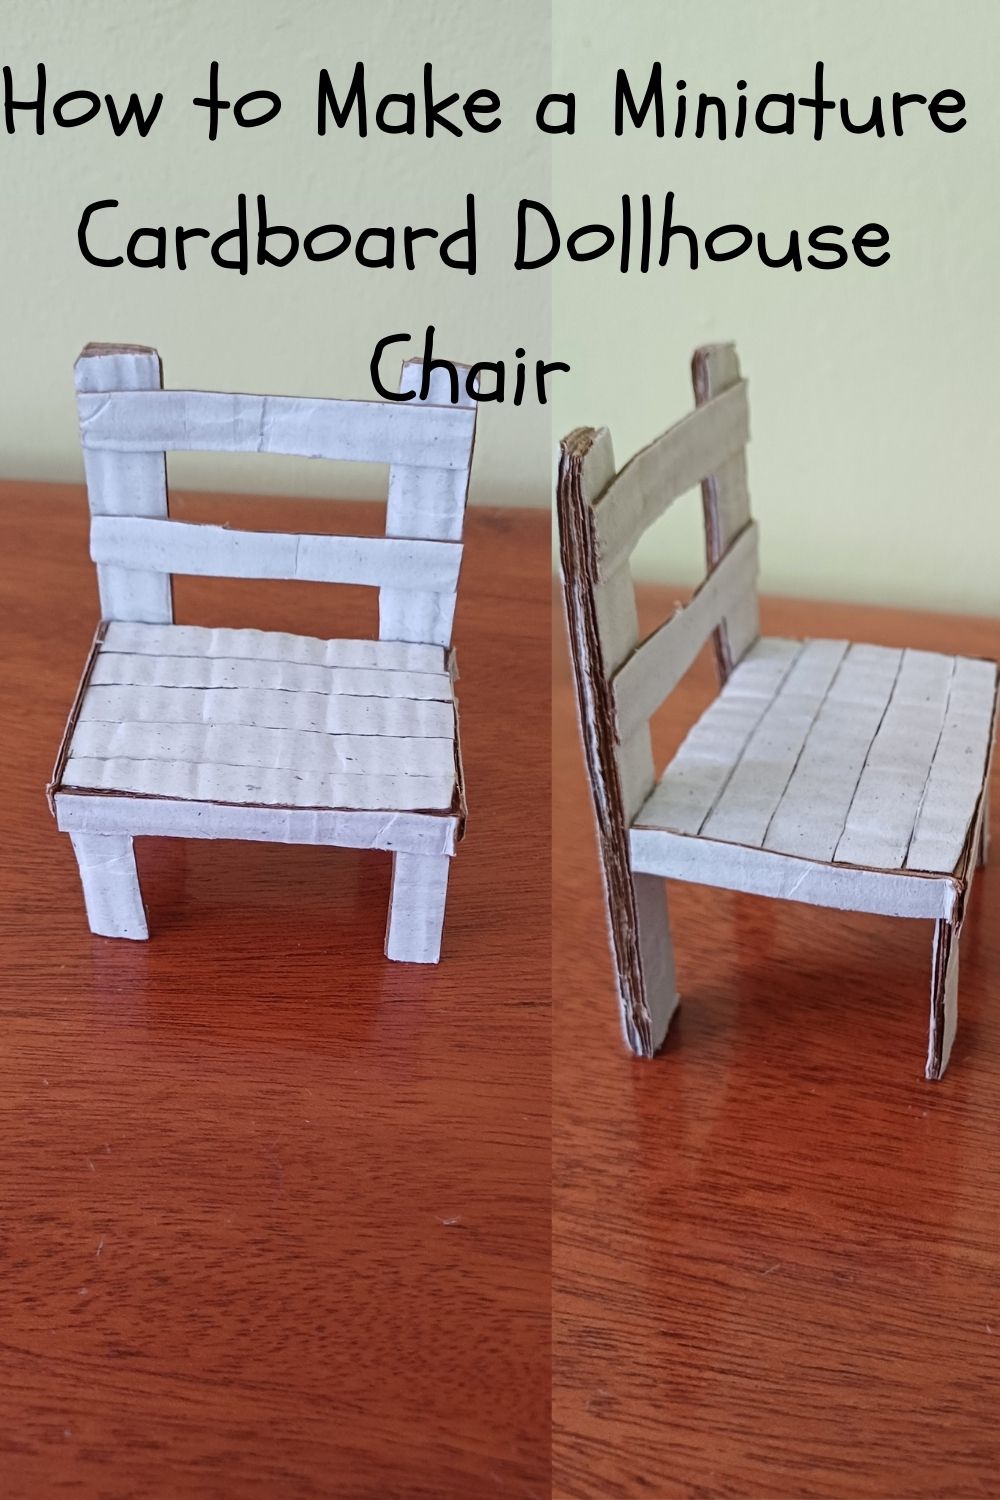
Creating miniature furniture for dollhouses can be a fun and rewarding DIY project. Whether you’re building an entire dollhouse or just adding a few custom pieces, this tutorial will guide you through making a charming miniature chair using a cardboard. Perfect for adding character and style to any dollhouse, this project is easy to follow and suitable for all skill levels.
How to Make a Miniature Cardboard Dollhouse Chair
Materials Needed:
- Cardboard sheets (medium thickness)
- Ruler
- Pencil
- Scissors or craft knife
- Hot glue gun and glue sticks
- White acrylic paint (or desired color)
- Paintbrush
Step 1: Measure and Cut the Pieces

1. Use a ruler and pencil to mark the following measurements on the cardboard:
- Seat: 2.5 inches x 2.5 inches (1 piece)
- Backrest slats: 2.5 inches x 0.5 inches (2 pieces)
- Legs: 2.5 inches x 0.5 inches (4 pieces)
- Backrest supports: 3.5 inches x 0.5 inches (2 pieces)
2. Carefully cut out each piece using scissors or a craft knife
Taking time to measure accurately ensures the chair will be balanced and sturdy. Use a sharp blade for cleaner cuts, and if needed, trim edges for a perfect fit.
Related Posts:
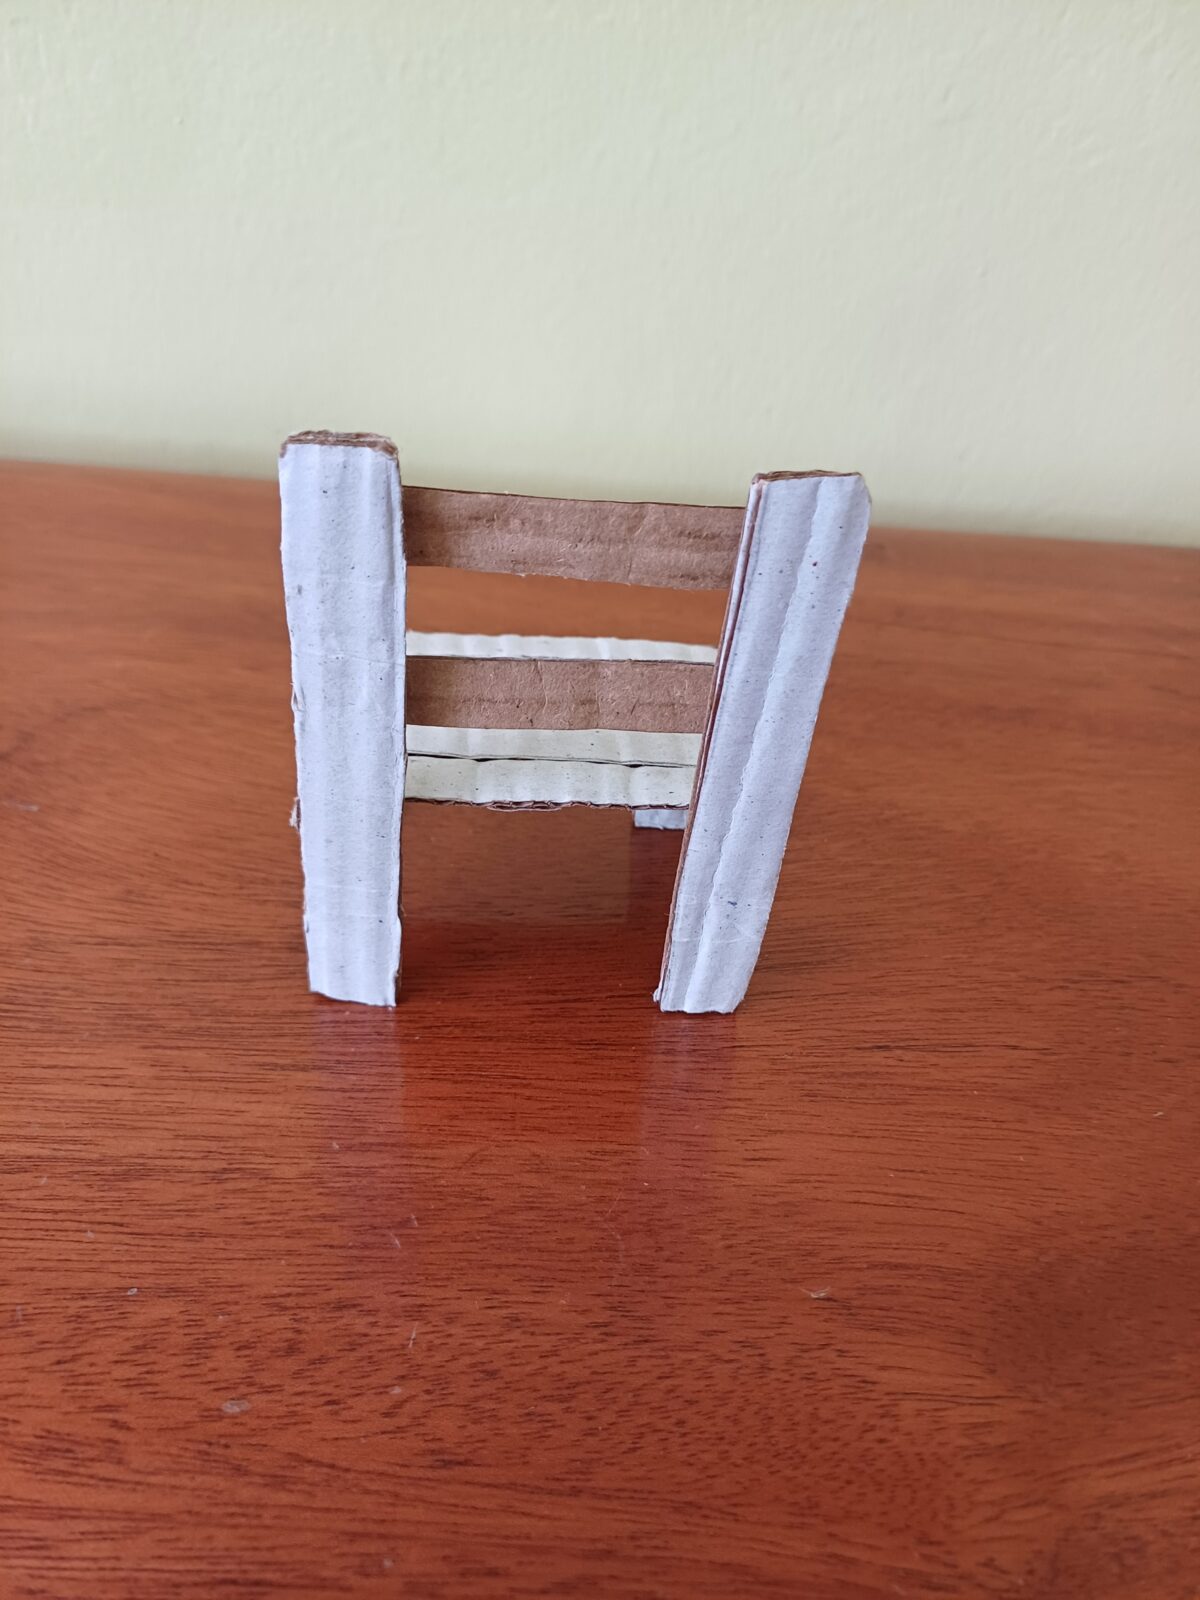
Step 2: Assemble the Seat and Legs
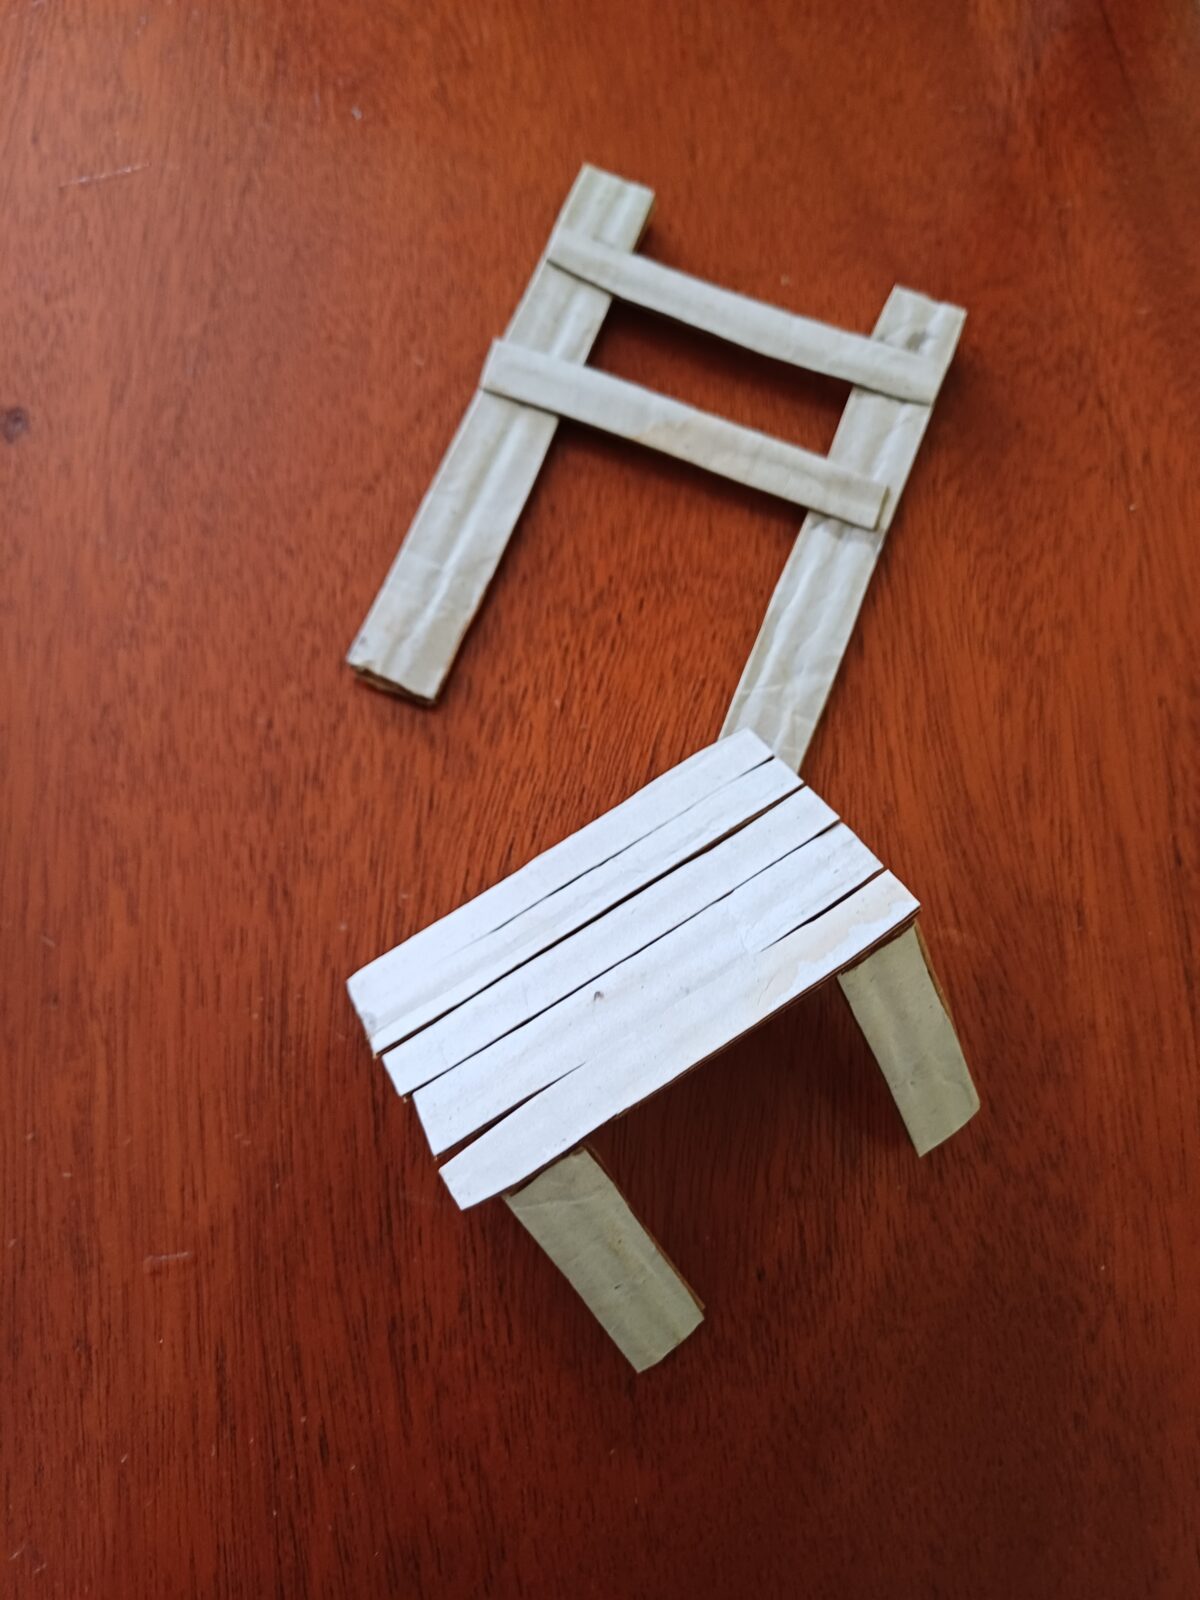
- Apply hot glue to attach the legs to the underside of the seat, one at each corner.
- Hold each leg in place until the glue sets completely.
Double-check that the legs are aligned properly to avoid wobbling. If any leg appears uneven, trim it slightly before the glue dries completely. This step forms the base of the chair, so precision is important.
Step 3: Create the Backrest
- Attach the two backrest supports vertically to the back of the seat. Position them about 0.5 inches from each side.
- Glue the horizontal slats across the supports. Space them evenly to create a ladder-back design.
- Ensure everything is aligned and hold until the glue dries
Adding the backrest provides structural support and gives the chair its classic look. If you’d like, you can add extra slats or adjust their spacing for a different design.
Step 4: Paint and Finish

- Apply a coat of white acrylic paint (or your chosen color) to the entire chair.
- Let the paint dry completely, then apply a second coat if needed for a smooth finish.
Painting not only improves the appearance of the chair but also strengthens the cardboard. Consider using spray paint for a smoother finish or adding patterns and designs to make the chair more eye-catching.
Step 5: Final Touches
- Check all joints to ensure they are sturdy.
- Add decorative elements like cushions or patterns if desired.
You can create miniature cushions by cutting small squares of fabric and stuffing them with cotton. This extra detail will make your chair even more realistic and cozy.
Tips:
- For added durability, reinforce joints with an extra layer of glue.
- Experiment with different colors or designs to match your dollhouse theme.
And there you have it! A cute and functional miniature cardboard chair perfect for your dollhouse or diorama. With just a few materials and some creativity, you can transform ordinary cardboard into a charming piece of furniture that will bring your dollhouse to life.

Hi! I’m Susie, the creative mind behind Cozy Castle 101. I love sharing easy and simple ideas to make home and garden spaces cozy and inviting. From simple DIY projects and fun crafts to family-friendly recipes, I’m all about creating a warm, welcoming home where memories are made. Join me as I explore ways to add a bit of creativity and charm to everyday life!